|
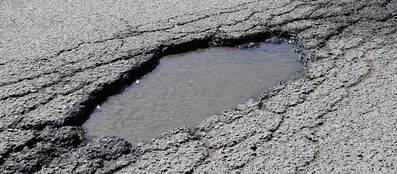
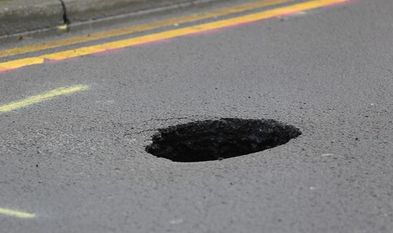
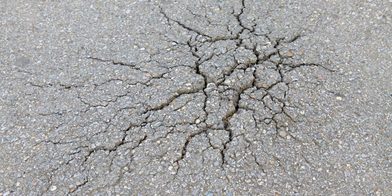
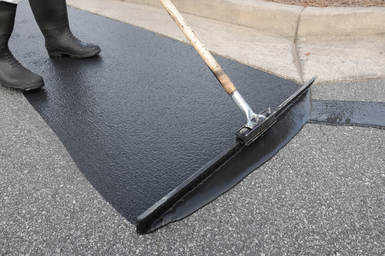
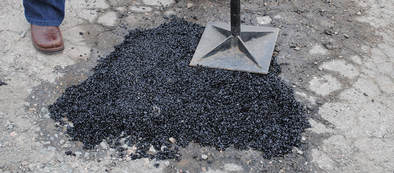
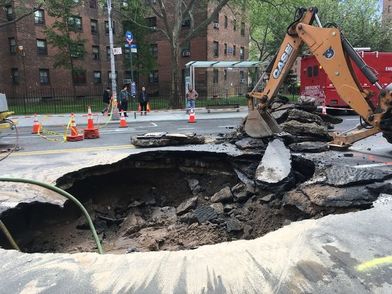
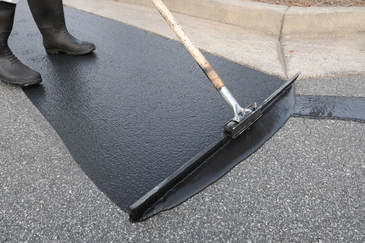
Keep in mind, we're a paving company with good standing with the state of Texas and the local communities we serve so if you have more productive things to do with your time than mess with the driveway, have us come out and do a free estimate. Additionally, these fixes are on the 'temporary' side. More permanent fixes are available with hot mix asphalt if preferred. Also... know the risks: There may be safety concerns for homeowners who choose to do their own driveway repair such as exposure to chemicals and irritants, damage to people, wires or pipes, or real estate due to heavy equipment, or incorrectly diagnosed or completed repairs. Have you asked yourself any of the following questions? • How do I fix alligator cracks in my asphalt driveway? • How do I repair a pothole in my asphalt driveway myself? • How can I seal coat my own asphalt driveway? How to fix my own driveway - The following offers a step by step overview of how to approach repairing your own damaged driveway: When it comes to asphalt driveway repair and maintenance, there are three main types of damage to look out for—alligator cracks, potholes, and sinkholes/birdbaths. Alligator cracks (sometimes called spider web cracks) are fine fractures that appear in the asphalt’s surface. They can result from wear due to fluctuations in temperature, heavy traffic, or even faulty construction. Alligator cracks may not be noticeable when you’re driving over them. However, they don’t look nice and, if left unchecked, can turn into potholes over time. Potholes result from untended alligator cracks. Potholes are simply holes where the asphalt has been broken and worn away. They can make for bumpy driving and sprained ankles if you trip on them. Potholes are disruptive, and usually grow larger if left unchecked. Sinkholes are similar to potholes in that they ruin the flatness of a driveway's surface. However, they are caused by different factors. A sinkhole forms when the base foundation beneath the asphalt has worn away due to erosion, poor construction, or other variables. The depression left behind still contains the material of the road surface. However, due to the unstable base, the affected section of driveway sinks. Small, less serious sinkholes are sometimes called birdbaths (usually 1” to 2” deep). Alligator cracks, potholes, and sinkholes all require unique methods of repair. Fixing alligator cracks To fix pesky alligator cracks, you’ll need the correct materials—alligator patch, sealcoat, and a squeegee. In general, one gallon of alligator patch material can cover 20 square feet. Make sure you consult with a professional to learn what type of and how much patch you’ll need before making your purchase. As for asphalt squeegees, they are pretty affordable. The standard sizes used are 24” and 36”. You may also want to grab an old paintbrush for places the squeegee can’t reach. For alligator cracks and all other types of driveway damage, you'll want a quality sealcoat to strengthen more repair. More on sealcoat in Step 3 of the alligator crack repair instructions! Have you gathered your materials? Let’s get started! Step 1: Clean your driveway! Make sure the area is free of dirt and debris such as weeds, as these materials will prevent the material used to repair the driveway from adhering properly. This can be accomplished with a broom or leaf blower. It may be tempting to use a hose or pressure washer to clean, but keep in mind that getting water in the cracks in your driveway can do more harm than good, particularly in areas where rapid changes in temperatures cause water to expand and contract. If you do choose to use water to clean the driveway, ensure that the area is completely dry before sealing any cracks, as moisture will cause additional damage. Step 2: Lay your patch Pour the alligator patch you have purchased to fill the cracks in areas needing repair, and use your asphalt squeegee to spread it evenly until the layer is 1/8 to 1/4“ thick. Use the squeegee to blend the new material into the existing, undamaged driveway surrounding the trouble spot. You can also use bottled crack filler to fix small cracks. Use a scraper to level off and spread this product. No matter which method you choose, allow several hours for the material to dry. Step 3: Sealcoat Using a sealcoat (also called sealant or sealcoating) is technically optional, but most experts agree that it contributes greatly to the longevity of your asphalt driveway. Sealcoat is made of coal tar pitch or asphalt cement mixed with fillers. The sealcoat protects the driveway surface and also makes it look nicer by giving a finished appearance to the entire surface. If you do choose to use a sealcoat, here’s what to do: First of all, you must wait until the repair material has had time to harden and fuse with the surrounding driveway. Depending on the patch you use and professional recommendations, waiting for the proper time to apply sealcoat after a repair varies from 4 to 8 weeks or even up to 2 years. Remember, asphalt maintenance is a journey, not a one time event! Once the product you use to fill in the alligator cracks is dry, you’re ready to lay the sealcoat. Working from the top of your driveway, pour the sealcoat in a line parallel to the garage door and use your squeegee to spread it evenly over the driveway working towards the road. For edges and hard to reach corners, use an old paintbrush. Make sure you exert enough pressure on the squeegee to spread the sealcoat thinly, but not so much that it oozes over the squeegee’s edge. When finished, allow at least 48 hours for the sealcoat to dry. Going along with that, make sure you choose a period of time in which no rain is expected, as precipitation will throw a wrench in your driveway maintenance plans. Check out our article about DIY seal coating for more detailed information! Fixing Potholes For potholes, you will want to purchase some cold asphalt patch. This usually comes in 50-lb bags and can be picked up at hardware or home goods stores such as Lowe’s. You will also need an asphalt tamper and sealcoat, if you wish. Step 1: Clean, clean, clean! As with alligator cracks, make sure your driveway is free of dirt and debris before beginning the repair. Step 2: How big is your pothole? Ten pounds of patch usually covers a square foot of pothole at a depth of 1". If the pothole is deep enough to reach the driveway’s base layer (usually made of gravel, dirt, or concrete), use sand or gravel to fill it in until it's level with where the asphalt layer begins. This will save you costly pothole filling material! Step 3: Pour your pothole patch. Pour your pothole patch into the hole, making sure to overfill by 1 to 2”. You can use a rake or other flat-headed tool to spread the patch material if necessary. Step 4: Compound your patch. Using your pothole tamper, compact the patch material so that it won’t crumble later on. Feel free to top off the hole as you compact the patch until the compacted patch is level with the rest of the driveway. Be thorough when compacting your patch, as doing so will increase the longevity of your repair. Step 5: Follow up with Sealcoat. Check out our article about DIY seal coating for more detailed information! As you did with repaired alligator cracks, use a good sealcoat post-pothole repair to protect your driveway! Fixing Birdbaths The term ‘birdbath’ is used to describe small sinkholes (usually less than 2” deep). Birdbaths can usually be repaired with the same material that is used to fix alligator cracks. Here’s how to do it: After cleaning out the birdbath depression, apply a layer of patch about 1/4” thick. Let it dry completely, which can take up to eight hours but depends on temperature and humidity, before applying another layer at the same thickness. Repeat the procedure until the patched area is level with the surrounding driveway. Then, apply a sealcoat. Fixing Sinkholes Sinkholes are depressions deeper than 2” and require pothole patch to repair correctly. Step 1: Know your sinkhole! Take a look at the sinkhole cracks. If the depression has cracks only around the perimeter where the material broke away from the surrounding asphalt, you can proceed with the following instructions to fix sinkholes. However, if the material in the sinkhole has fractured, you will have to use a pry bar or other tool to remove the chunks before moving forward with your repair. After removing these pieces, you can repair the sinkhole as you would a pothole. Step 2: Have the right tools for the job. Because sinkholes are less stable than potholes, repairing them can be tricky. Instead of a pothole tamper, consider renting a plate compactor or roller to compact the patch, especially if you’re dealing with a shallow sinkhole where the patch might not have as much sticking power. This will increase the longevity of your repair. Additionally, if the sinkhole goes past the layer of asphalt into the driveway’s base layer, don’t use sand or gravel at the bottom of your repair as you might when repairing a normal pothole. Instead, use patch material all the way through to increase stability. We generally caution homeowners from fixing serious items like this on their own. It's a safety thing and there may be unforeseen consequences from not hiring a professional. Step 3: Sealcoat As with repairs made to alligator cracks, potholes, and birdbaths, use sealcoat to seal up your repair and protect your driveway. Check out our article about DIY seal coating for more detailed information! A final not about sinkholes: Sinkholes can seriously undermine the integrity of an asphalt surface. If the sinkholes in your driveway are too extensive, it is probably best to tear up the bad asphalt and rebuild the foundation to the level of the surrounding base before filling with patch. Keep in mind that this method is time and energy intensive and usually requires equipment rental, so it may be better to hire a professional if you want those big sinkholes filled in properly. There you have it! An overview of what you need to repair your driveway, and how to do it!
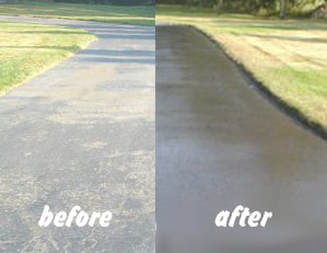
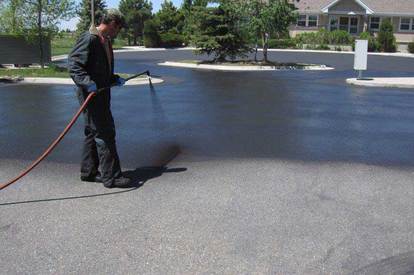
Driveway Seal Coat Information, How to, and Pro's and Con's. Many homeowners wonder whether or not it’s worth it to get a seal coat (also called sealcoating, sealcoat or sealant) for their asphalt and concrete driveways. Sealcoat may seem like an extra expense. However, experts agree that proper application of seal coat is a fundamental component of driveway surface protection. The average life expectancy of a paved driveway is about 15 years. However, high quality and timely sealcoating and crack repair may as much as double the lifespan of a driveway! What is sealcoat? Sealcoat is a thin layer of material applied to finished asphalt or cement surfaces. It is made of either coal tar pitch or asphalt cement combined with fillers, water, emulsifiers, and other additives. Seal coats can be purchased at most hardware stores or from driveway servicing providers, who usually have their own custom formulas. Professionals use large tanks of premium tar instead of buckets sold in stores. Sealcoats are applied to protect driveways from damage caused by gasoline and oils, salt, water, and UV rays. Additionally, sealcoats improve the appearance of asphalt driveways, in particular, by hiding discoloration (usually caused by pavement oxidization over time) under a neat black finish. The most notable benefit is sealing small cracks and fissures so that water cannot easily penetrate through, which can cause more serious cracking and erosion of the top layer of driveway asphalt. Larger cracks can be filled with hot rubber which repairs deep cracks and prevents small cracks from growing into larger ones. What are the benefits of a sealcoat? In addition to improving a driveway’s appearance by giving it a uniform color and texture, good sealcoats slow oxidation by filling the small spaces between particles on the driveway’s surface. This keeps oxygen and the sun’s rays, as well as oil, gas, and other destructive elements, from sinking into the pavement’s surface. Similarly, sealcoat protects from water damage, in which water soaks into and enlarges existing cracks, particularly in areas where temperatures fluctuate between thaws and freezing. How often should I apply sealcoat? Most experts recommend applying new sealcoat every two to three years, depending on extreme weather and heavy traffic. When should I apply sealcoat? Before applying sealcoat to a paved surface, you may need to repair any damage, such as potholes or alligator cracks, existing in the driveway’s surface. This is particularly important if the cracks go through to previous asphalt layers or all the way to the dirt below. Remember, sealcoat is a protective layer. It is not meant to repair structural problems in your driveway. Experts differ in opinion on how long you should wait to seal your driveway after finishing repairs. Some claim you should wait six to twelve months, while others say you only have to wait four to eight weeks. Your best bet is to check the instructions on the sealcoat you purchased or ask the professional you bought it from for advice about that particular formula or ask your paving expert. Waiting the proper amount of time before applying sealcoat is necessary in order to let all areas repaired with hot mix to properly harden and fuse with the surrounding surface. How do I apply sealcoat? Because sealcoat is water-soluble, it should be applied at a time when there will be no rain for at least 48 hours. Beware of lawn sprinklers as well, as they can interfere with proper sealcoat application if used 48 hours before or after the sealcoat is applied. Additionally, choose a time of year where extreme temperatures will not affect the sealcoat’s ability to dry and cure properly. Good conditions are usually thought to be when the temperature is in the range of 60 degrees Fahrenheit. Sunny weather is ideal, as sunlight helps the sealcoat cure faster. When can I drive on it? Driving over a drying sealcoat should also be avoided when possible, but even thought the material would not be cured, in hot and dry weather, sealcoat may be dry enough to drive on in as little as 30 minutes after application. In most cases, it is recommended to stay off a recently seal coated driveway for a full day if possible. How can I apply sealcoat DIY style? To apply sealcoat, you will need mixed sealcoat (check the instructions for mixing on the sealcoat you buy, as how to prepare the material varies by product), as well as an asphalt squeegee, gloves, a face mask, and protective eyewear. You may want one of the white protective suits as well to avoid ruining clothes and to avoid the irritation that can occur with exposure to the product. You may also want to bring along an old paintbrush to get those tricky edges and corners. After ensuring that your driveway is clean (you can use a broom or leaf blower, but be cautious with pressure washers, as your driveway must be completely dry before you can apply sealcoat), retrieve your prepared sealcoat. Working from the top of your driveway, pour the sealcoat in a straight line in front of where you will be spreading it, and use your squeegee to smooth it evenly over the driveway. For edges and hard to reach corners, use the paintbrush. Make sure you exert enough pressure on the squeegee to spread the sealcoat thinly, but not so much that it oozes over the squeegee’s edge. When finished, allow 48 hours for the sealcoat to dry and cure. You can apply a second coat if desired (and if recommended in the instructions). A note about oversealing: If you use sealcoat too often, it can cause more harm than good. Oversealed driveways develop cracks in the layer of sealcoat (thought not in the asphalt beneath). These cracks look unsightly and can run pretty deep. Remember, your driveway doesn’t need new sealcoat more often than once every two years. Save yourself the time and money, and just wait until it’s necessary. How do the professionals do it? The biggest difference between DIY sealcoating and professional sealcoating is that professionals use spray tanks. Edges are still done the same way, but large areas are evenly coated with a large tank that feeds a high pressure spray wand. Professionals also generally fill deep cracks with hot rubber that is not commonly available to DIY'ers. Concrete Driveways The process of sealcoating a concrete driveway is a little different than that used on asphalt. First of all, concrete sealcoat lasts longer—about four to five years. As with sealcoating asphalt, you need to repair and clean your concrete driveway beforehand and wait until a period of dry, temperate weather to move forward with the sealcoat application. A note on selecting sealcoat for concrete: A penetrating concrete sealcoat is a good choice for older driveways. Over time, concrete becomes more absorbent, allowing penetrating sealcoat to soak in and prevent water, oil, gasoline, and other liquids from causing damage. Make sure you understand the instructions for preparation and application of your sealcoat. Concrete sealcoat is usually applied with a sprayer, so it’s important to wear protective gloves, a face mask, and eye protection as well. Move the sprayer in a back and forth sweeping motion to ensure that the product is applied in an even, thorough fashion. Pro's and Con's
A Final Word
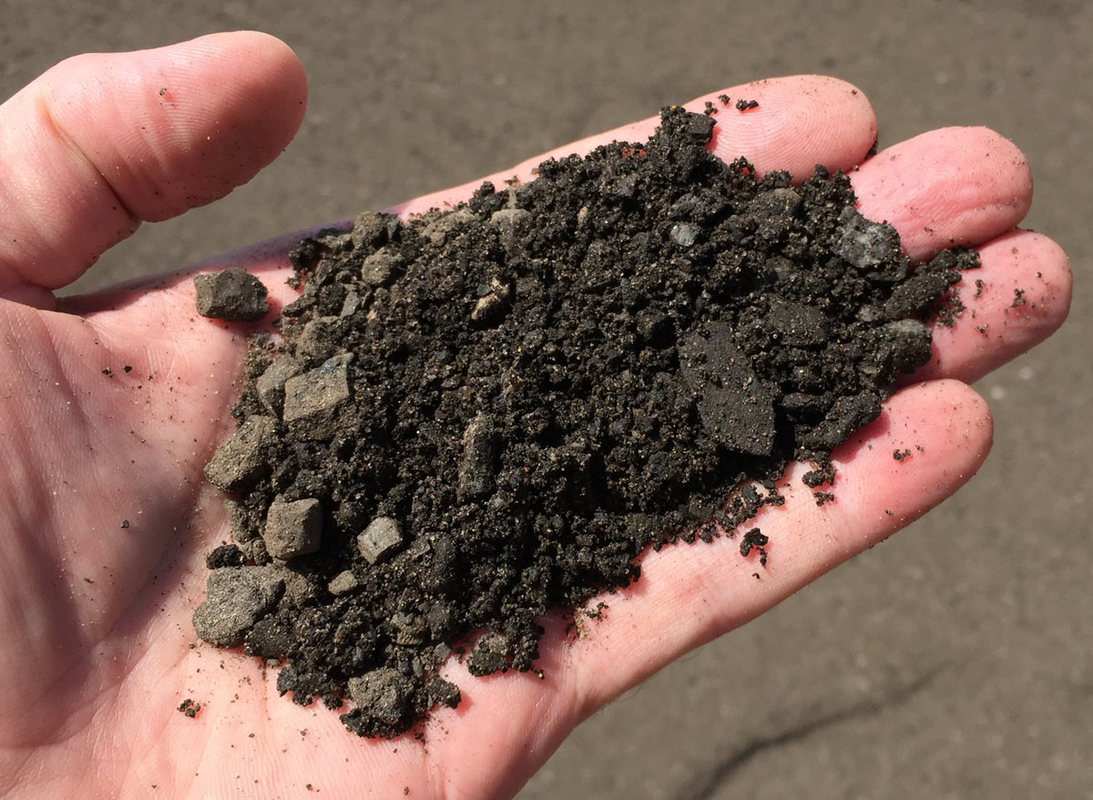
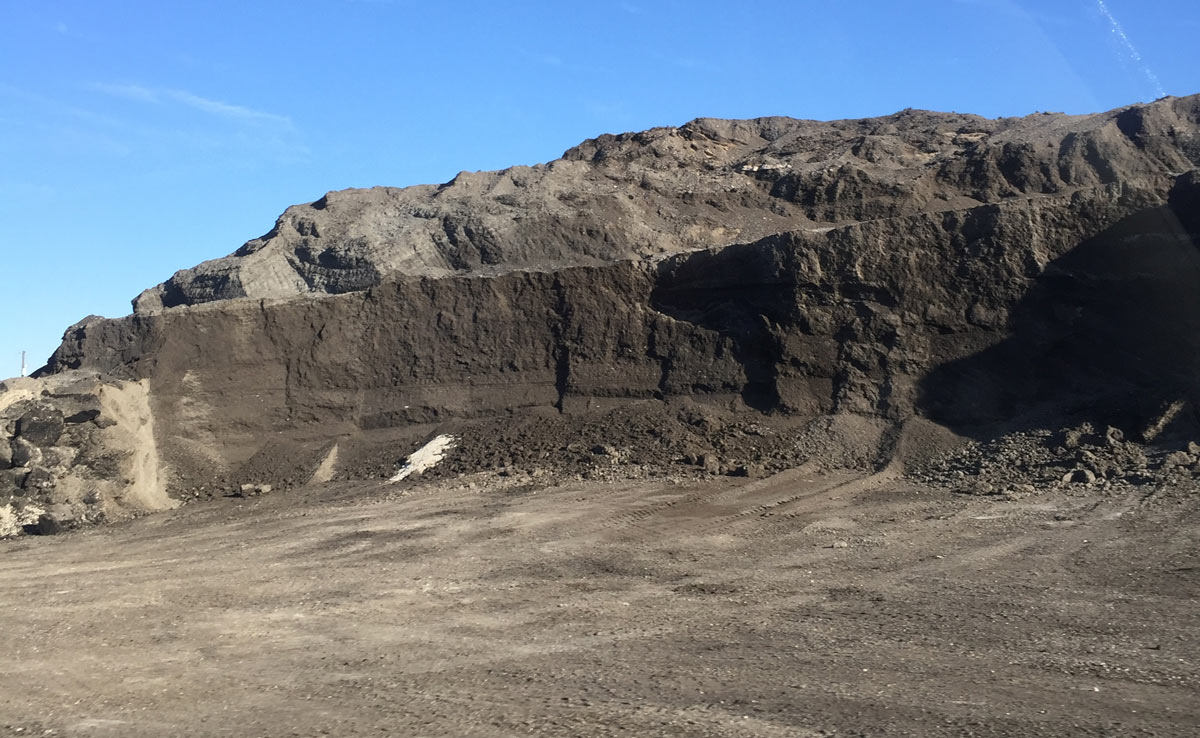
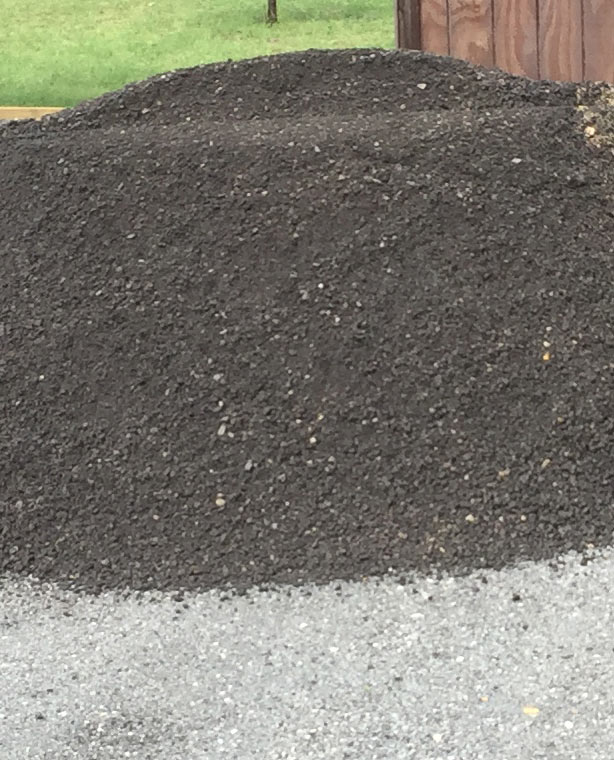
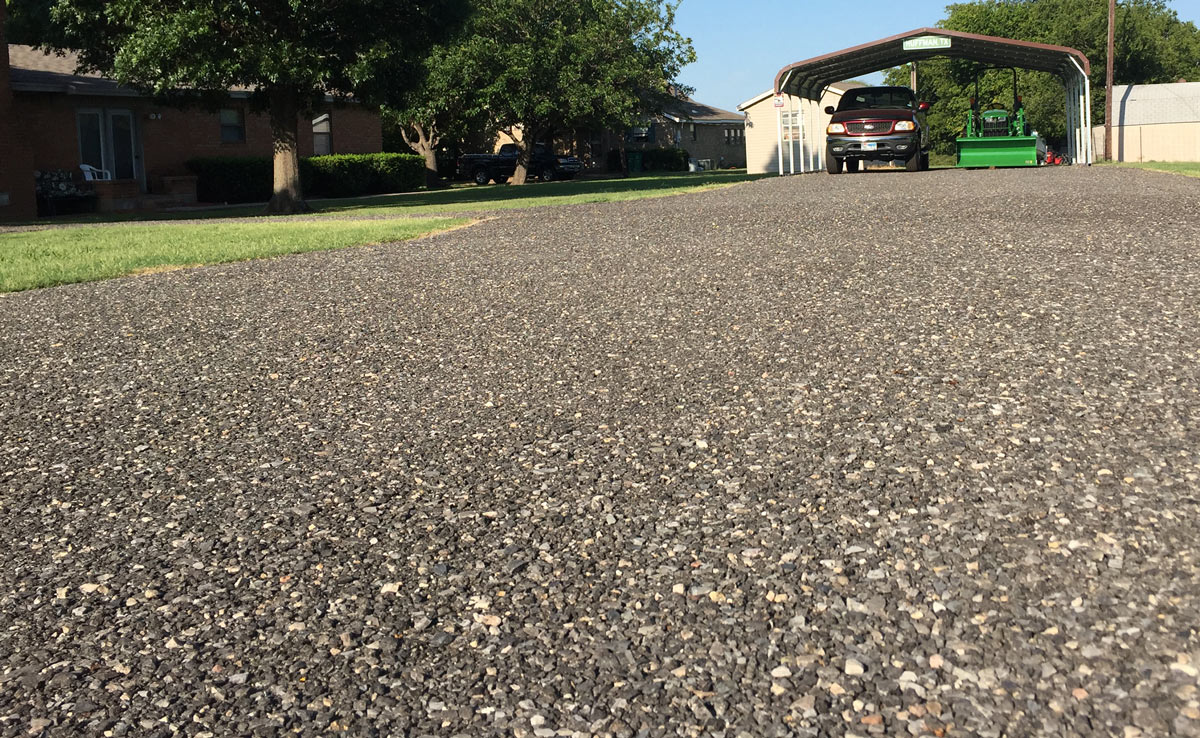
There you have it! This article has given you the knowledge you need to make an informed decision about whether or not to sealcoat your driveway. Remember to defer to your specific product’s specifications to find out mixing instructions and the amount of product that will be needed for your paved space. Lastly, when it doubt, consult with your local driveway maintenance company. Recycled asphalt (sometimes referred to as 'crushed asphalt') is old roadway that has been removed and crushed at an asphalt plant. It goes from large compacted chunks to a granular product like you see here: An asphalt plant accepts deliveries of our old highways and they end up crushed into a big pile like this: The material retains the tar from the former road so it can be mixed with new asphalt, or used in new and different ways. Presently, driveways, walking paths, RV or boat pads, and rural parking lots are using recycled asphalt to create a dust-free semi-solid surface doesn't get muddy. When it first gets delivered it has a darker look to it but as time goes on it lightens up. This next photo shows a new pile being put on top of one that is a few months old: After a driveway, ranch road, or rural parking lot have been covered by recycled asphalt it begins to tighten up as heat, water, and humidity help filter the finer particles downward and harden them. Even though it begins to turn back into a road it will continue to have a thin layer of looser small rock at the top:
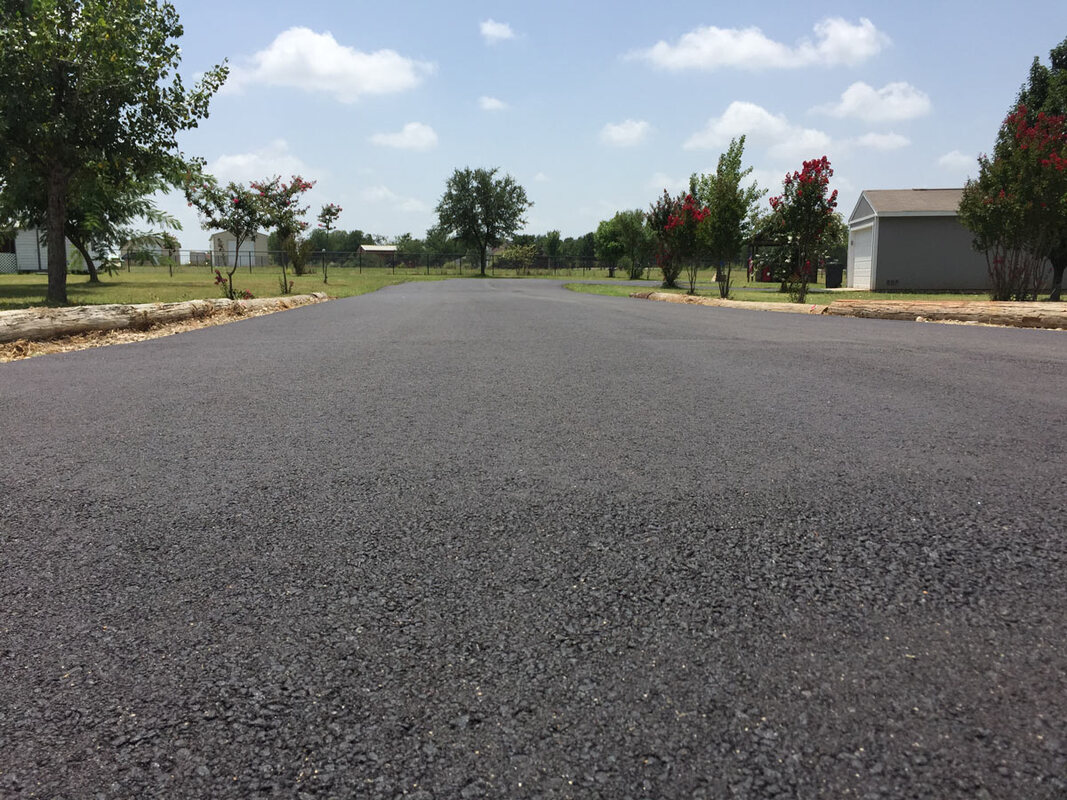
When a hot mix asphalt driveway starts showing signs of age, if the damage isn't too severe it can be paved over. We have to spend time preparing the driveway beforehand by addressing the most damaged spots so an even coat of asphalt can be applied. For this job, we had a mix of damaged surfaces, so lot of prep was needed. Hot mix asphalt is a bit of a challenge when it's over 100 degrees outside, but we think this one turned out amazing!
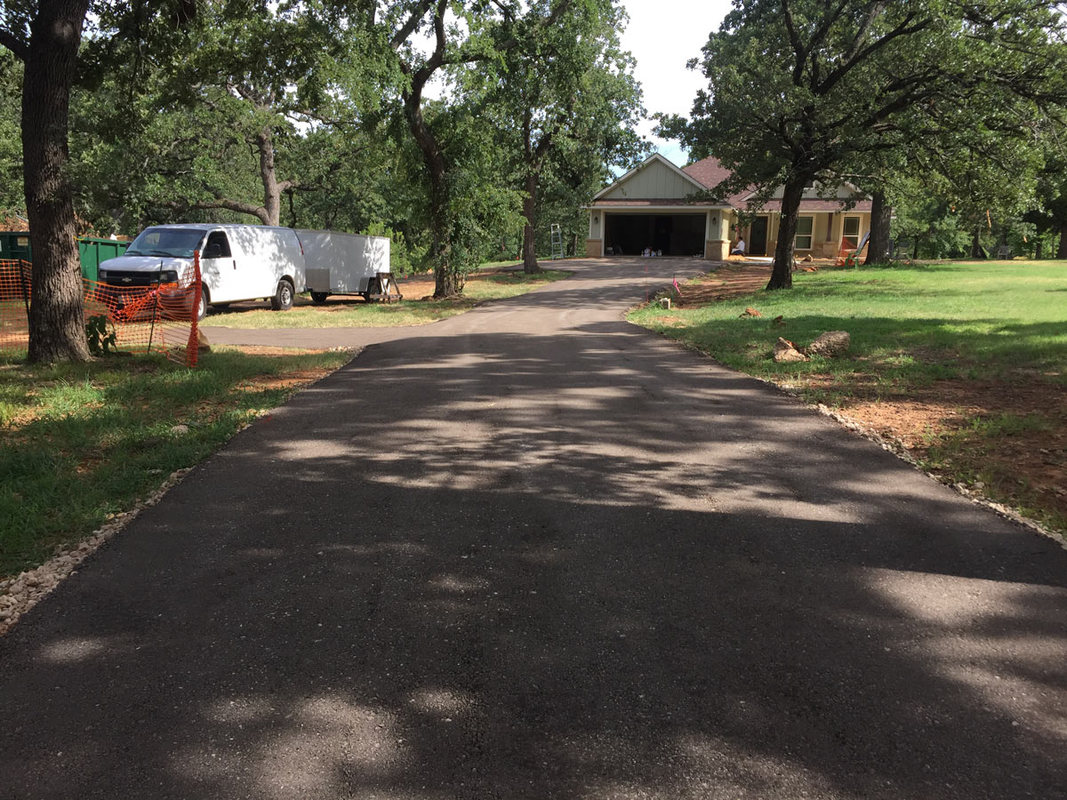
Congrats go out to this homeowner as they wrap up construction on their newly paved home. This involved grading out some material that was there, putting in a few drain pipes, and paving recycled asphalt through a paving machine and compacting. Low price compared to concrete or hot mix, but fits into the country surroundings perfectly. Looks amazing!
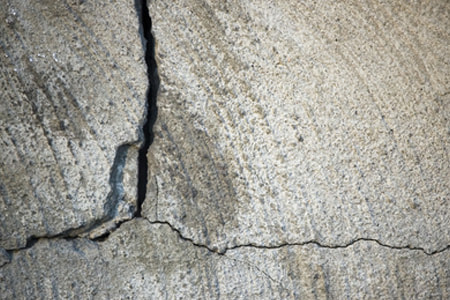 It's a good idea to fill any cracks in your cement driveway before they become bigger issues and now is a great time to do it. Winter can expand and contract cracks and make them worse so a few minutes outside could help out a lot. Believe it or not, just a few dollars in supplies and you could extend the life of your driveway not only a year or two, but the repairs although they may not hold forever, the lifespan could be extended by many, many years if you keep on top of it from time to time. Here's the most basic instructions you could ever find: • Clean the driveway - use a leaf blower, broom, and whatever you need to to clear grass and debris from cracks. • Use a wire brush or hard broom to remove pieces that are very loose. The idea is to have a clean, solid surface for filler to adhere to. • Fill small cracks with a textured caulk, a liquid concrete, or a concrete sealer. • With deep cracks you have a few options. The first of which is to decide if you could fill the crack with sand partially so that the crack has a solid base again instead of voids. Visit your home improvement store or look for the best products online. There are consumer product choices such as vinyl concrete patch, concrete grout, and driveway caulk to choose from. Follow the directions on the product and fill cracks as recommended. That's the quickest summary to get you started, but here's the key: The pressures OFF! That's because any repair you do to the cracks will be better than letting another year come and go without doing anything! P.S. If you need better instructions or a second opinion there are many articles online and you can always call a cement installation company for their opinion. |
Country RoadsRural drives and private roads are our passion. We post recent jobs, paving techniques, and tips and tricks here. Enjoy! Archives
January 2023
Categories
All
|

 RSS Feed
