|
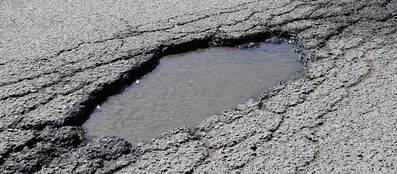
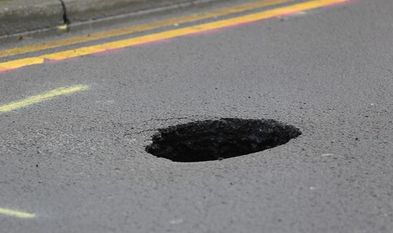
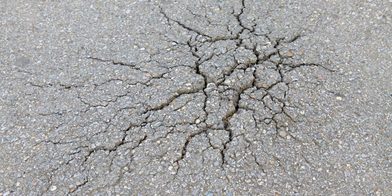
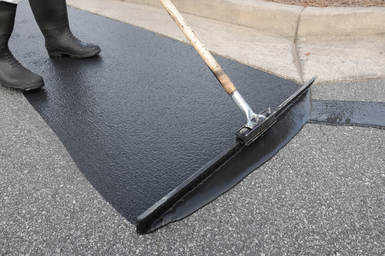
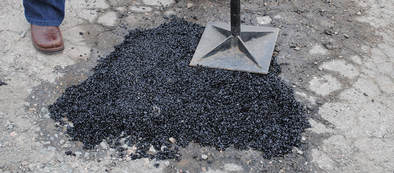
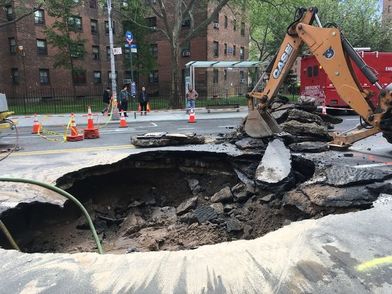
Keep in mind, we're a paving company with good standing with the state of Texas and the local communities we serve so if you have more productive things to do with your time than mess with the driveway, have us come out and do a free estimate. Additionally, these fixes are on the 'temporary' side. More permanent fixes are available with hot mix asphalt if preferred. Also... know the risks: There may be safety concerns for homeowners who choose to do their own driveway repair such as exposure to chemicals and irritants, damage to people, wires or pipes, or real estate due to heavy equipment, or incorrectly diagnosed or completed repairs. Have you asked yourself any of the following questions? • How do I fix alligator cracks in my asphalt driveway? • How do I repair a pothole in my asphalt driveway myself? • How can I seal coat my own asphalt driveway? How to fix my own driveway - The following offers a step by step overview of how to approach repairing your own damaged driveway: When it comes to asphalt driveway repair and maintenance, there are three main types of damage to look out for—alligator cracks, potholes, and sinkholes/birdbaths. Alligator cracks (sometimes called spider web cracks) are fine fractures that appear in the asphalt’s surface. They can result from wear due to fluctuations in temperature, heavy traffic, or even faulty construction. Alligator cracks may not be noticeable when you’re driving over them. However, they don’t look nice and, if left unchecked, can turn into potholes over time. Potholes result from untended alligator cracks. Potholes are simply holes where the asphalt has been broken and worn away. They can make for bumpy driving and sprained ankles if you trip on them. Potholes are disruptive, and usually grow larger if left unchecked. Sinkholes are similar to potholes in that they ruin the flatness of a driveway's surface. However, they are caused by different factors. A sinkhole forms when the base foundation beneath the asphalt has worn away due to erosion, poor construction, or other variables. The depression left behind still contains the material of the road surface. However, due to the unstable base, the affected section of driveway sinks. Small, less serious sinkholes are sometimes called birdbaths (usually 1” to 2” deep). Alligator cracks, potholes, and sinkholes all require unique methods of repair. Fixing alligator cracks To fix pesky alligator cracks, you’ll need the correct materials—alligator patch, sealcoat, and a squeegee. In general, one gallon of alligator patch material can cover 20 square feet. Make sure you consult with a professional to learn what type of and how much patch you’ll need before making your purchase. As for asphalt squeegees, they are pretty affordable. The standard sizes used are 24” and 36”. You may also want to grab an old paintbrush for places the squeegee can’t reach. For alligator cracks and all other types of driveway damage, you'll want a quality sealcoat to strengthen more repair. More on sealcoat in Step 3 of the alligator crack repair instructions! Have you gathered your materials? Let’s get started! Step 1: Clean your driveway! Make sure the area is free of dirt and debris such as weeds, as these materials will prevent the material used to repair the driveway from adhering properly. This can be accomplished with a broom or leaf blower. It may be tempting to use a hose or pressure washer to clean, but keep in mind that getting water in the cracks in your driveway can do more harm than good, particularly in areas where rapid changes in temperatures cause water to expand and contract. If you do choose to use water to clean the driveway, ensure that the area is completely dry before sealing any cracks, as moisture will cause additional damage. Step 2: Lay your patch Pour the alligator patch you have purchased to fill the cracks in areas needing repair, and use your asphalt squeegee to spread it evenly until the layer is 1/8 to 1/4“ thick. Use the squeegee to blend the new material into the existing, undamaged driveway surrounding the trouble spot. You can also use bottled crack filler to fix small cracks. Use a scraper to level off and spread this product. No matter which method you choose, allow several hours for the material to dry. Step 3: Sealcoat Using a sealcoat (also called sealant or sealcoating) is technically optional, but most experts agree that it contributes greatly to the longevity of your asphalt driveway. Sealcoat is made of coal tar pitch or asphalt cement mixed with fillers. The sealcoat protects the driveway surface and also makes it look nicer by giving a finished appearance to the entire surface. If you do choose to use a sealcoat, here’s what to do: First of all, you must wait until the repair material has had time to harden and fuse with the surrounding driveway. Depending on the patch you use and professional recommendations, waiting for the proper time to apply sealcoat after a repair varies from 4 to 8 weeks or even up to 2 years. Remember, asphalt maintenance is a journey, not a one time event! Once the product you use to fill in the alligator cracks is dry, you’re ready to lay the sealcoat. Working from the top of your driveway, pour the sealcoat in a line parallel to the garage door and use your squeegee to spread it evenly over the driveway working towards the road. For edges and hard to reach corners, use an old paintbrush. Make sure you exert enough pressure on the squeegee to spread the sealcoat thinly, but not so much that it oozes over the squeegee’s edge. When finished, allow at least 48 hours for the sealcoat to dry. Going along with that, make sure you choose a period of time in which no rain is expected, as precipitation will throw a wrench in your driveway maintenance plans. Check out our article about DIY seal coating for more detailed information! Fixing Potholes For potholes, you will want to purchase some cold asphalt patch. This usually comes in 50-lb bags and can be picked up at hardware or home goods stores such as Lowe’s. You will also need an asphalt tamper and sealcoat, if you wish. Step 1: Clean, clean, clean! As with alligator cracks, make sure your driveway is free of dirt and debris before beginning the repair. Step 2: How big is your pothole? Ten pounds of patch usually covers a square foot of pothole at a depth of 1". If the pothole is deep enough to reach the driveway’s base layer (usually made of gravel, dirt, or concrete), use sand or gravel to fill it in until it's level with where the asphalt layer begins. This will save you costly pothole filling material! Step 3: Pour your pothole patch. Pour your pothole patch into the hole, making sure to overfill by 1 to 2”. You can use a rake or other flat-headed tool to spread the patch material if necessary. Step 4: Compound your patch. Using your pothole tamper, compact the patch material so that it won’t crumble later on. Feel free to top off the hole as you compact the patch until the compacted patch is level with the rest of the driveway. Be thorough when compacting your patch, as doing so will increase the longevity of your repair. Step 5: Follow up with Sealcoat. Check out our article about DIY seal coating for more detailed information! As you did with repaired alligator cracks, use a good sealcoat post-pothole repair to protect your driveway! Fixing Birdbaths The term ‘birdbath’ is used to describe small sinkholes (usually less than 2” deep). Birdbaths can usually be repaired with the same material that is used to fix alligator cracks. Here’s how to do it: After cleaning out the birdbath depression, apply a layer of patch about 1/4” thick. Let it dry completely, which can take up to eight hours but depends on temperature and humidity, before applying another layer at the same thickness. Repeat the procedure until the patched area is level with the surrounding driveway. Then, apply a sealcoat. Fixing Sinkholes Sinkholes are depressions deeper than 2” and require pothole patch to repair correctly. Step 1: Know your sinkhole! Take a look at the sinkhole cracks. If the depression has cracks only around the perimeter where the material broke away from the surrounding asphalt, you can proceed with the following instructions to fix sinkholes. However, if the material in the sinkhole has fractured, you will have to use a pry bar or other tool to remove the chunks before moving forward with your repair. After removing these pieces, you can repair the sinkhole as you would a pothole. Step 2: Have the right tools for the job. Because sinkholes are less stable than potholes, repairing them can be tricky. Instead of a pothole tamper, consider renting a plate compactor or roller to compact the patch, especially if you’re dealing with a shallow sinkhole where the patch might not have as much sticking power. This will increase the longevity of your repair. Additionally, if the sinkhole goes past the layer of asphalt into the driveway’s base layer, don’t use sand or gravel at the bottom of your repair as you might when repairing a normal pothole. Instead, use patch material all the way through to increase stability. We generally caution homeowners from fixing serious items like this on their own. It's a safety thing and there may be unforeseen consequences from not hiring a professional. Step 3: Sealcoat As with repairs made to alligator cracks, potholes, and birdbaths, use sealcoat to seal up your repair and protect your driveway. Check out our article about DIY seal coating for more detailed information! A final not about sinkholes: Sinkholes can seriously undermine the integrity of an asphalt surface. If the sinkholes in your driveway are too extensive, it is probably best to tear up the bad asphalt and rebuild the foundation to the level of the surrounding base before filling with patch. Keep in mind that this method is time and energy intensive and usually requires equipment rental, so it may be better to hire a professional if you want those big sinkholes filled in properly. There you have it! An overview of what you need to repair your driveway, and how to do it!
|
Country RoadsRural drives and private roads are our passion. We post recent jobs, paving techniques, and tips and tricks here. Enjoy! Archives
January 2023
Categories
All
|

 RSS Feed
